How are Stainless Steel Pipes Joined? Technical Recommendations & Accessory Supply
Joining stainless steel pipes incorrectly leads to costly leaks and system failures. This compromises operational safety and results in expensive downtime. Mastering the right techniques and accessories is essential.
Stainless steel pipes are joined using methods like welding (TIG, MIG), mechanical joining (threaded, flanged, grooved), and brazing. The best method depends on application pressure, temperature, and pipe diameter, supported by the correct accessories like gaskets and flanges for a secure seal.
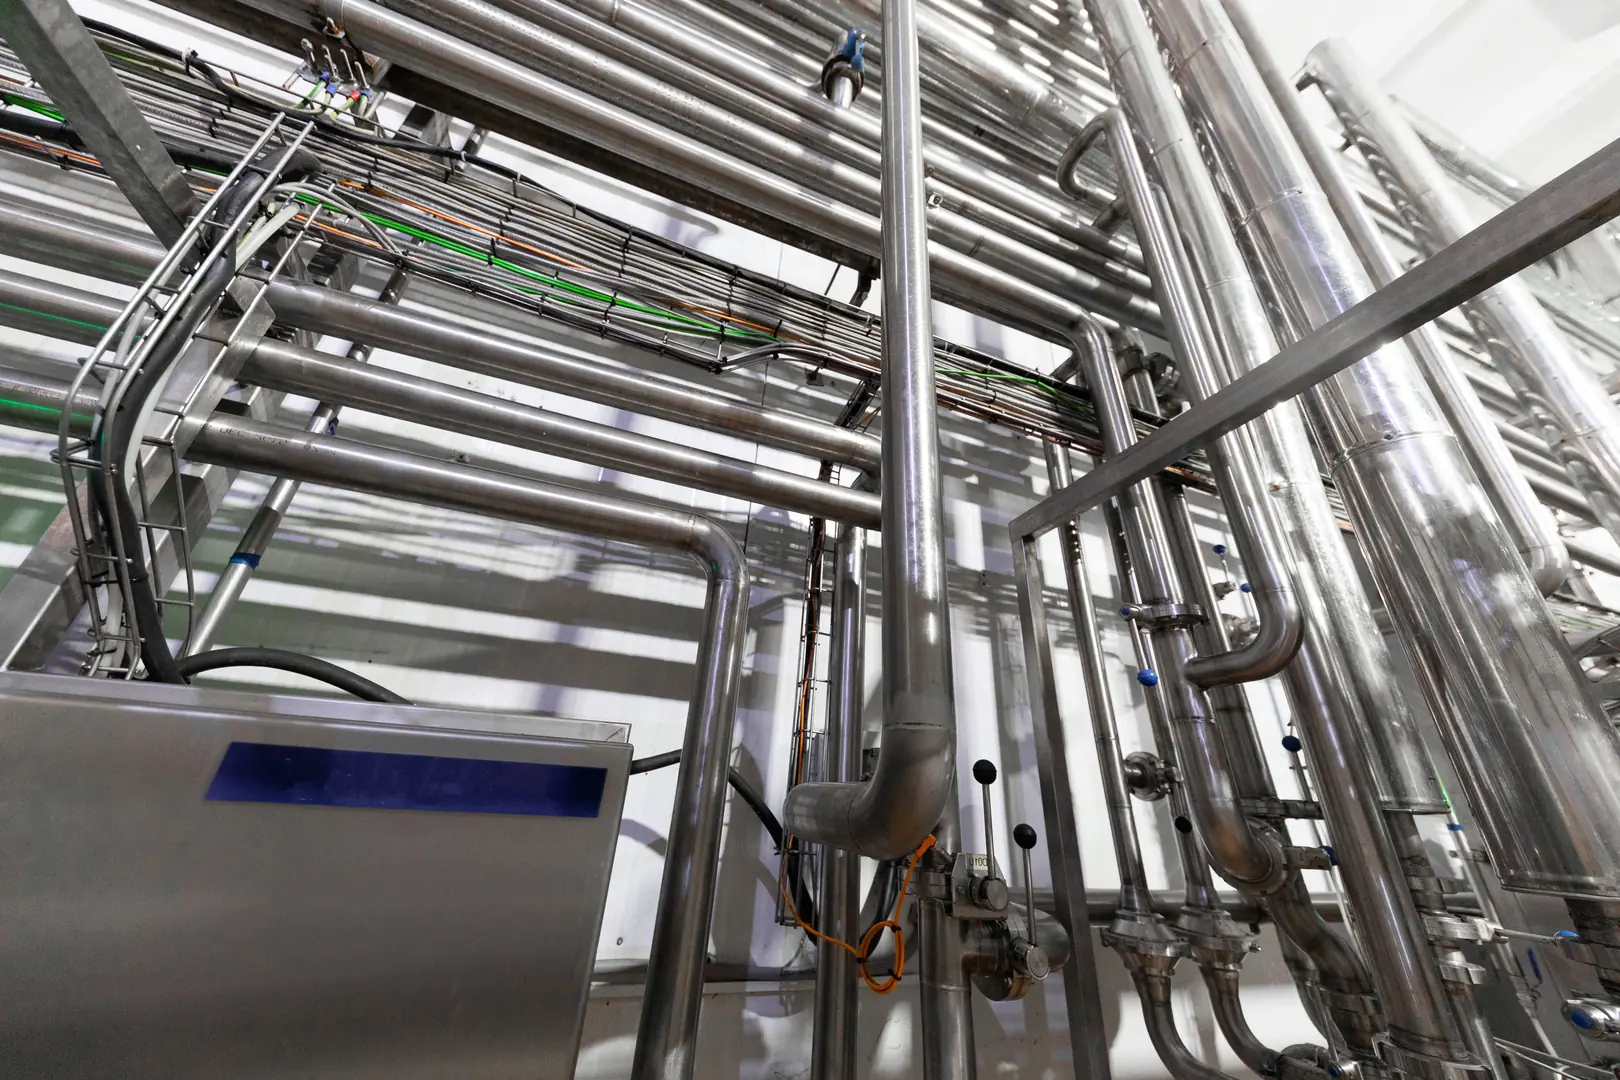
In my role at MFY, I've seen countless projects succeed or fail based on this one critical area: how the pipes are connected. It’s not just about the pipe itself; it’s about creating a single, integrated system that performs under pressure. The integrity of your entire operation—whether in petrochemicals, water treatment, or food processing—relies on the strength and reliability of these joints. Let's walk through the essential steps, from preparation to final inspection, to ensure your stainless steel piping systems are built for longevity and peak performance.
Step 1: How Should You Prepare Stainless Steel Pipes for Joining?
Improper pipe preparation is a direct path to a weak joint. This small oversight leads to immediate failures and costly, time-consuming rework. A strict, methodical preparation protocol guarantees a strong connection.
Proper preparation involves cutting the pipe ends squarely, deburring to remove sharp edges, and thoroughly cleaning the joining surfaces of any oil, grease, or contaminants. This ensures a clean, sound connection for any joining method.
Preparation is a step that simply cannot be rushed. I remember a client in the food and beverage industry who was facing recurring contamination issues. We traced the problem back to microscopic crevices in their pipe joints caused by improper deburring during installation. It was a costly lesson in the importance of fundamentals. The goal of preparation is to create a perfect surface for joining, free of any physical or chemical imperfections that could compromise the final bond. This foundational step is identical whether you plan to weld, thread, or flange the connection.
Key Preparation Stages
- Cutting: The cut must be perfectly square to the pipe's axis. A square end ensures full contact and alignment, which is critical for both welding and mechanical seals. Using a dedicated pipe cutter or a cold saw[^1] is far superior to an abrasive disc, which can introduce heat and contaminants into the material.
- Deburring: After cutting, the inner and outer edges of the pipe will have small, sharp burrs. These must be completely removed with a deburring tool. For welded joints, burrs can disrupt the weld pool and create weak spots. For mechanical joints, they can damage gaskets or threads, leading to leaks.
- Cleaning: This is the final and most crucial preparation step. The surface must be immaculate. Any trace of oil, grease, paint, or dirt will interfere with the joining process.
| Cleaning Agent | Application | Cautions |
|---|---|---|
| Acetone | Excellent for removing oils, grease, and inks. | Highly flammable, requires good ventilation. |
| Isopropyl Alcohol | Good general-purpose cleaner, less aggressive. | Slower evaporation rate than acetone. |
| Specialized Cleaners | Formulated for specific contaminants. | Must be compatible with stainless steel grades. |
Always use a clean, lint-free cloth and wipe in one direction to avoid spreading contaminants. By dedicating the proper attention to these preparation steps, you set the stage for a flawless, durable joint that will serve your system for years to come.
Step 2: How Do You Select the Appropriate Joining Method for Stainless Steel Pipes?
Choosing the wrong joining method is a common and expensive mistake. It directly compromises the system's performance, safety, and long-term reliability. A systematic selection based on key criteria ensures optimal results.
Select the joining method by evaluating application pressure, temperature, fluid type, and budget. Welding is best for high-pressure, permanent joints. Mechanical joints offer flexibility for systems requiring maintenance, while brazing is for lower-pressure applications.
The selection process is a strategic decision, not just a technical one. It impacts everything from initial installation costs to long-term maintenance schedules. For a high-pressure steam line in a chemical plant, welding is non-negotiable for safety and permanence. But for a modular water filtration system that may need to be reconfigured, flanged or grooved joints provide necessary flexibility. The key is to match the method to the operational reality of the system. At MFY, we often advise clients to think about the entire lifecycle of the piping system, not just the installation day. This foresight prevents costly retrofits down the road.
Comparing Common Joining Techniques
The three main categories of joining stainless steel pipes are welding, mechanical joining, and brazing/soldering. Each has distinct advantages and is suited for different environments.
| Method | Pressure Rating | Cost (Initial) | Skill Required | Removability | Best For |
|---|---|---|---|---|---|
| Welding (TIG/MIG) | Very High | Moderate | High | No | Permanent, leak-proof joints in critical, high-pressure systems. |
| Flanged Joint | High | High | Moderate | Yes | Systems requiring periodic access, maintenance, or disassembly. |
| Threaded Joint | Low to Moderate | Low | Low | Yes | Low-pressure, small-diameter applications like plumbing. |
| Grooved Joint | Moderate | Moderate | Low | Yes | Fire protection, HVAC, and systems requiring fast assembly. |
Deeper Dive into Methods
- Welding: This creates a monolithic, continuous structure that is as strong as the pipe itself. Tungsten Inert Gas (TIG) welding is the preferred method for stainless steel as it produces a very clean, high-quality weld with excellent corrosion resistance. It's the gold standard for sanitary applications in the food, beverage, and pharmaceutical industries.
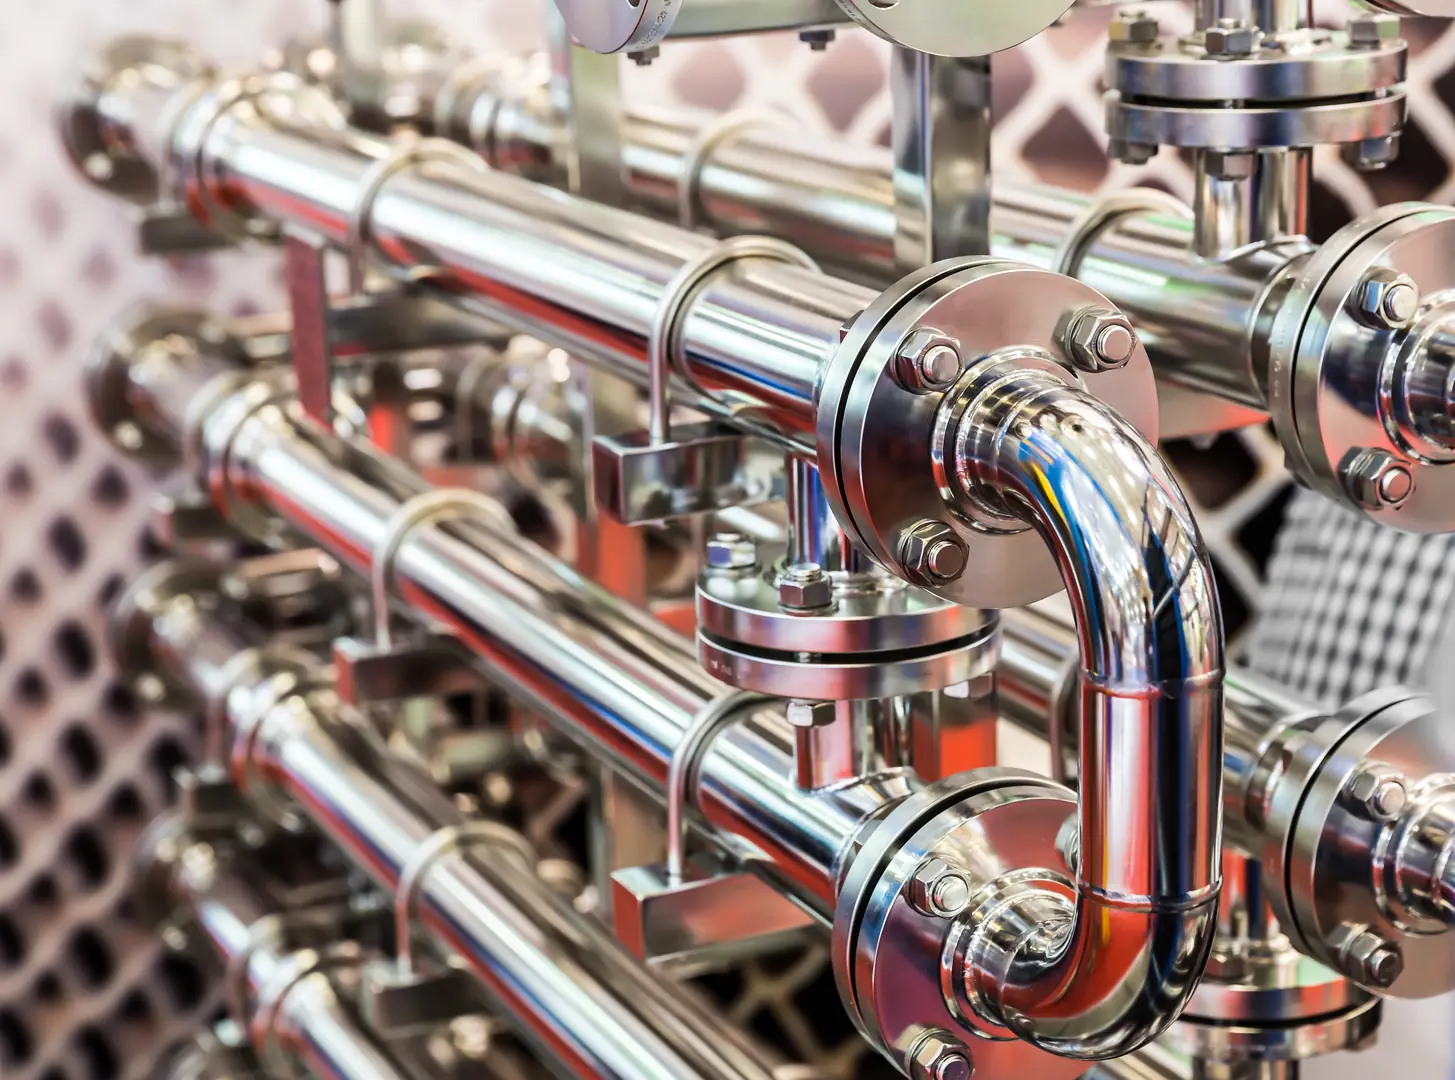
- Mechanical Joints: These methods use physical force to seal a joint. Flanged joints are incredibly robust and involve bolting two flanges together with a gasket in between, creating a very strong and reliable seal that can be disassembled. Threaded joints are simpler but are generally limited to smaller diameter pipes and lower pressures to avoid the risk of leaks.
- Brazing/Soldering: These methods use a filler metal with a lower melting point than the stainless steel to join the pipes. They are not suitable for high-pressure or high-temperature structural applications but can be effective for certain plumbing or HVAC systems.
Choosing correctly means balancing performance requirements with budget and maintenance needs.
Step 3: How Can You Implement the Chosen Joining Technique Safely?
Safety is often overlooked during the rush of a project schedule. Accidents during pipe joining can cause severe injuries and significant project delays. Adhering to strict safety protocols is non-negotiable.
Implement joining techniques safely by using appropriate Personal Protective Equipment (PPE), ensuring proper ventilation, especially for welding fumes, and following established safety procedures for handling tools and equipment. Always conduct a pre-task safety briefing.

Safety isn't an option; it's the foundation of quality work. I've been on project sites where a simple lack of ventilation during welding led to serious health issues for the team. A safe work environment is an efficient work environment. When technicians feel secure and have the right equipment, they can focus on the quality of their work without cutting corners. This commitment to safety protects your people and your investment, ensuring the project is completed correctly and without incident. It's a culture we instill in every part of our operation at MFY, from the production floor to our client consultations.
Welding Safety Protocols
Welding stainless steel presents specific hazards, primarily related to fumes and radiation.
- Ventilation: Welding stainless steel releases chromium and nickel fumes, which are hazardous. Always work in a well-ventilated area or use a local exhaust ventilation (LEV) system to capture fumes at the source.
- Respiratory Protection: A powered air-purifying respirator (PAPR) is often required, especially in confined spaces, to protect against harmful metal fumes.
- Eye and Skin Protection: The arc from welding emits intense ultraviolet (UV) and infrared (IR) radiation. An auto-darkening welding helmet is essential to protect the eyes. Fire-resistant clothing, leather gloves, and high-top boots protect the skin from sparks, spatter, and radiation burns.
Mechanical Joining Precautions
While they don't involve fumes or radiation, mechanical methods have their own risks.
- Tool Safety: Whether using a pipe threader, a grooving machine, or a wrench for tightening bolts, it's crucial to use the tools as per the manufacturer's instructions. Ensure all guards are in place and that the tools are in good working order.
- Handling and Lifting: Pipes and large fittings can be heavy and awkward. Use proper lifting techniques or mechanical aids to prevent musculoskeletal injuries.
- Personal Protective Equipment (PPE): Safety glasses are a minimum requirement to protect against flying debris. Gloves are also essential to protect hands from sharp edges and pinch points.
A pre-task briefing to review the specific hazards of the day's work is a simple but incredibly effective way to keep safety at the forefront of everyone's mind.
Step 4: What Is the Best Way to Inspect the Quality of Pipe Joints?
A finished joint is not automatically a good joint. Hidden defects like micro-cracks or incomplete fusion can lead to catastrophic system failure. Thorough inspection and testing are crucial to verify integrity.
Inspect joint quality through visual inspection for defects, followed by non-destructive testing (NDT) methods like dye penetrant, radiographic, or ultrasonic testing for critical applications. Pressure testing the completed system is the final verification step.
Verification is about building confidence in your system. We once worked with an engineering contractor on a major water treatment plant. A junior technician thought a weld "looked fine" and skipped the specified dye penetrant test. Weeks later, during the initial system pressure test, that exact joint failed, causing a significant flood and project delay. This reinforced a core principle for us: trust, but verify. A rigorous inspection plan isn't bureaucracy; it's insurance against future failure. It ensures that the quality you designed is the quality you actually built.
The Inspection and Testing Pyramid
Think of quality verification as a multi-layered process, starting with the simplest method and moving to the more complex.
- Visual Inspection (VI): This is the first line of defense. A trained inspector looks for obvious external flaws. For welds, this includes checking for correct weld size, cracks, undercut, and porosity. For mechanical joints, it involves verifying bolt torque, gasket alignment, and proper thread engagement. A simple checklist can ensure consistency.
- Non-Destructive Testing (NDT): When visual inspection isn't enough, NDT methods are used to find subsurface defects without damaging the joint.
| NDT Method | What It Detects | Best For |
|---|---|---|
| Dye Penetrant (PT) | Surface-breaking cracks and porosity. | Finding very fine surface defects in welds. |
| Radiographic (RT) | Internal flaws like slag inclusions and lack of fusion. | Critical welds requiring volumetric inspection. |
| Ultrasonic (UT) | Internal cracks and other volumetric flaws. | Thick-walled pipe and complex joint geometries. |
- Pressure Testing: This is the ultimate proof of system integrity. The entire piping system is filled with water (hydrostatic testing) or air/nitrogen (pneumatic testing) and pressurized to a level specified by the project code (typically 1.5 times the operating pressure). The system is held at this pressure for a set period to check for any leaks or pressure drops, confirming that every single joint is sound.
Step 5: What are the Recommended Accessories and Supplies for Stainless Steel Pipe Joining?
The best stainless steel pipe is useless without the right accessories. Using mismatched or low-quality supplies compromises the integrity and longevity of the entire system. Sourcing high-quality, compatible accessories is critical.
Essential accessories include flanges, gaskets, fasteners (bolts and nuts), fittings (elbows, tees), and welding consumables (filler rods, gases). The material grade of these accessories must match the pipe to prevent corrosion and ensure system integrity.

This is an area where a fully integrated supply chain, like ours at MFY, provides immense value. The performance of a piping system is determined by its weakest link. Too often, I see companies invest heavily in high-grade stainless steel pipes, only to pair them with generic, low-quality gaskets or incorrect fasteners. This creates a point of failure. The accessories are not an afterthought; they are an integral part of the system's design. Ensuring the material grade, pressure rating, and quality of every flange, bolt, and gasket matches that of the pipe is fundamental to achieving the operational resilience and longevity required in today's demanding industrial environments.
A Guide to Essential Accessories
The quality and availability of these components are just as critical as the pipes themselves.
- Flanges and Gaskets: Flanges are the connectors, but gaskets are the seal. The gasket material[^2] must be chosen based on the fluid type, temperature, and pressure. A gasket suitable for water may degrade instantly when exposed to certain chemicals. The flange type (e.g., slip-on, weld neck) must also match the application's pressure requirements.
- Fittings and Fasteners: Fittings, such as elbows and tees, change the direction of the pipe run. It is absolutely essential that they are of the same material grade (e.g., 304L, 316L) as the pipe to prevent galvanic corrosion. Similarly, the bolts and nuts used to connect flanges must have the correct material strength and corrosion resistance for the operating environment.
Matching Supplies to the Joining Method
The required supplies are directly tied to your chosen joining method.
| Joining Method | Key Accessories & Supplies | Critical Considerations |
|---|---|---|
| Welding | Filler Wire/Rods, Shielding Gas (e.g., Argon), Tungsten Electrodes (for TIG) | Filler metal must match the base metal. Gas purity is essential. |
| Flanged | Flanges, Gaskets, Bolts, Nuts, Washers | Gasket material compatibility, correct bolt torque specifications. |
| Threaded | Threaded Fittings, Pipe Sealant (Tape or Compound) | Sealant must be rated for the fluid and temperature. |
| Grooved | Grooved Couplings, Gaskets, Grooved Fittings | Gasket (lubricant) must be compatible with the gasket material. |
By treating the supply of these accessories with the same importance as the pipes, you ensure a seamless, reliable, and durable system from start to finish.
Conclusion
Success in stainless steel pipe joining rests on five pillars: meticulous preparation, methodical selection, safe execution, thorough inspection, and sourcing quality accessories. Mastering these steps ensures the long-term integrity, safety, and efficiency of your entire piping system, safeguarding your investment and optimizing operational performance.
Have Questions or Need More Information?
Get in touch with us for personalized assistance and expert advice.